How to steam a long hand-painted silk scarf in a stovetop steamer
After learning how to paint on silk using the ancient French techniques whilst I was living in Paris, I returned to Australia – bright eyed, and bushy-tailed, so excited to continue with my new-found skill!
After a few months, I managed to locate a craft business which was selling stovetop steamers. Bear in mind, this was way before the Internet!
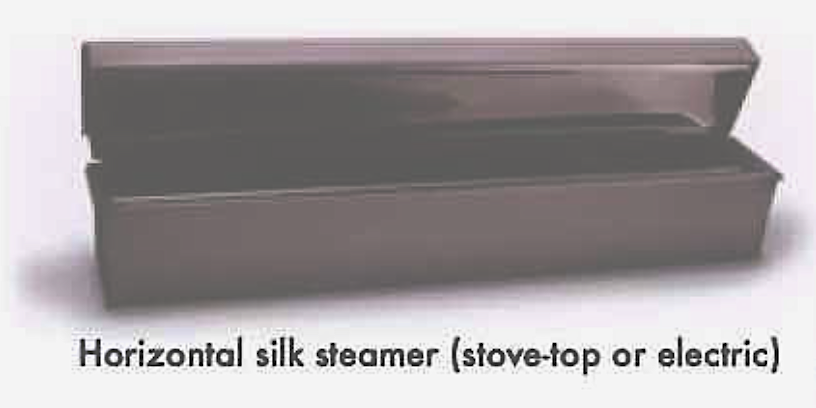
My steamer was about 36 inches wide, and it sat on top of my stove. I would pour boiling water in it, and then prepare the silk to be steamed by laying it out flat on White butcher paper. Years later I started using thin, white cotton fabric instead of paper, which saved me a lot of money
Stovetop silk steamer approximately 36″ wide

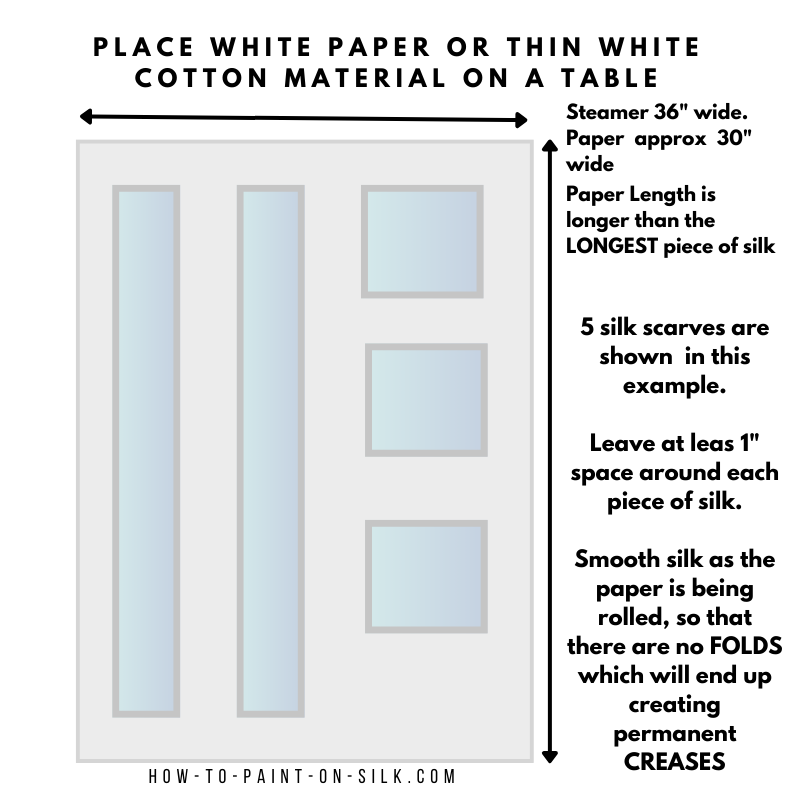
Laying the silk on the paper or white cotton
In this diagram below, I am showing an example of two long scarves and three small square scarves ready to be steamed.
The tips to remember here are:
- My steamer was 36 inches wide, so I made sure the paper was about 30 inches wide.
- Give the paper I was using was too wide. I would just fold it down one side so that it fit..
- When laying the silk down onto the paper, I made sure that there was always at least 1 inch all the way around each piece of silk, so that no silk touched any other silk
- I used a wooden dowel rod and started at one end of the paper, and then started rolling the dowel so that it would roll up the paper and silk
- I was very careful to not have any folded silk in this parcel (because that would become a permanent crease)
- Once the silk, paper and dowel were rolled up, I would secure the parcel with masking tape, and sometimes I would roll the whole parcel up in more paper, just to be safe.
- When the finished parcel was ready to go into the steamer (where the water was already bubbling and boiling), I placed the parcel on the two supports inside the steamer, where they would sit once the lid goes down
- I would set the timer, which for me was three hours because that’s what the French dye manufacturer had specified.
- I also checked the steamer every hour to make sure that there was still enough water in the base, bubbling away. If I needed more water, I would just boil the kettle and pour that in to keep the steamer operational.
- When the steamer was finished, I would use oven gloves to open the lid, and to remove the Silk parcel on the wooden rod.
- I would leave the parcel to cool off and then come back later to open it up and be absolutely excited and thrilled over the amazing colours I had created on my designs
- I always lay the silk out, draped over furniture in my studio, and gave it overnight to breathe and relax the silk, followed by washing the following day.
How to prevent permanent creases during steaming process
When I was preparing my silk to go into my stovetop steamer, I was very conscious of making sure that there were no FOLDS in the silk unless I wanted them to be there.
The reason for this is any fold before steaming becomes a sharp CREASE after steaming, so if you don’t want any permanent creases – do not allow any folds when you’re setting up the silk for the machine.
I haven’t used my stove top steamer for about 30 years 
Happy painting! Fill your life with silk and colour and the world will be marvellous, every day!
I’m sending big hugs your way!
Let me know if you have any other questions about your silk painting
These are some fast ways to get in touch with me:
- sending me a message or
- post a Comment below
- pop over to my Facebook page >>
- or post a Comment on YouTube >>
I look forward to hearing from you soon!
Ciao ciao for now,
![]()
Teena Hughes | Silk Artist | Textile Designer | Unique Wearable Art


