Waxing Lyrical On My First Use of Hot Wax on Hand-painted Silk in 2003
This article was published in the Silk Painters Guild UK newsletter in 2003
by Teena Hughes, Australian Silk Artist and Textile Designer
CAUTION – Hot wax needs to be prepared properly. Please see info below.
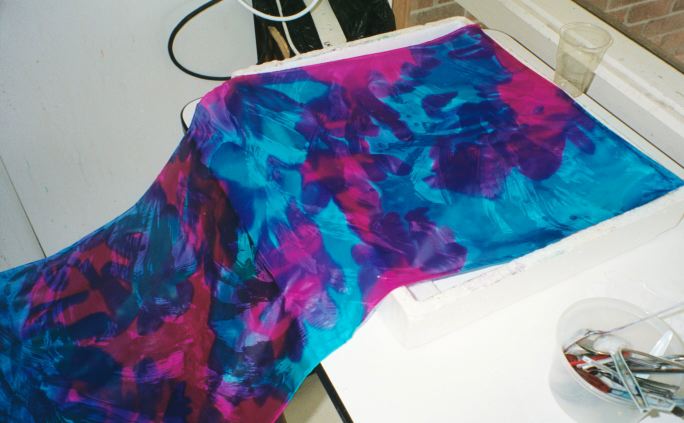
After hand-painting the silk scarf, I stretch it across a styrofoam box before I apply the hot wax.
I have just come home from three and a half hours in the Fabulous Fabrics textile painting class I’ve signed up for every Tuesday for 9 weeks, here in Sydney (Australia).
I’m excited to say I used hot wax!!! I’ve been painting on silk for almost 20 years, and I’ve NEVER melted hot wax and painted it onto silk! Wow – what an adventure!
Step 1 – applying the wax
PLEASE NOTE: The hot wax technique of drawing onto silk is an ancient one, but has come under scrutiny in the past few decades when statistics have shown that ill-health can result after using some textile dyes and other products.
It is documented that years ago dye factory workers and some silk artists and textile design workers succumbed to different types of cancer, which is believed to be from too much exposure to chemicals in textile dyes and products from many years of usage. Please take extreme care, read as much as you can about the sensible use of textile dyes and products, and always have an extremely well-ventilated work area, windows open, to allow any fumes to escape.
View links at the bottom of the page for expert information.
Now I have mentioned the caution, let’s proceed 🙂
Time to paint our silk pieces and silk scarves
We all “stretched” our silk first, and the technique used is one I’ve never seen before. Because this is a workshop, no silk frames are provided – the teacher explained to us that it was best to learn the quickest way to stretch silk with the minimum items, in case we ever needed to do so in the future.
Stretching & suspending the silk
I had washed my silk the night before, and ironed it so I was all set.
We tore pieces off a roll of masking tape, about 2″ [5cm] long, and we stuck them to the LONG edge of the work tables (one student on each side of a table).
Then with dressmakers’ pins close by, we pinned the long edge of the silk (or silk scarf) to the top of the masking tape (not the sticky underside).
When the silk was hanging like a long banner along the edge of the table, we started attaching the other long side to the tops of chairs by using the same technique with the masking tape and pins.
- Imagine you can see chairs at a table, which are then pulled out far enough for the silk to reach from the long edge of the table.
- With this technique, the silk has pieces of masking tape about 6-8″ apart down each of the long sides. The masking tape is pinned to the silk, and on one side stuck to the table edge, and the other side is stuck to the top of each chair.
We had to make sure the chairs were facing towards the table, out of the way, then we put an old sheet along the seats of the chairs to protect them from paints and dyes. [In my home studio I have wooden frames, but this is a good idea if you’re travelling or don’t have a frame with you.]
I was about to learn how to use powdered dyes for the first time – we watched the teacher mix them into gorgeous colours, and I chose some of my favourites, hot pink and turquoise, and started painting the silk in my “mad artist” style.
- To melt the wax, we plugged in an old electric frying pan, added the wax, which melted rapidly and was kept very hot.
- I found the smell (odour) of the hot wax quite unpleasant.
When the silk dyes were dry, I was shown how to pin the silk over the edges of a styrofoam box, to support it while I applied the wax.
- This was so I could bring the silk to the hot wax, as there was nowhere to sit the hot wax near my painting space.
- In your own studio or at home, you would probably leave the silk on the frame and bring a container of hot wax to the framed silk.
- I used a very wide brush, and tentatively applied the wax with a swift brushstroke … I watched the wax quickly cool and congeal on the silk, wow!
- I knew that wherever I put the wax on top of the dyed silk, the colours would remain visible in the finished product, so I liberally applied the wax willy-nilly.
Once the wax was dry, I re-attached the scarf to the table with pins and masking tape (which I’d left there), and it was time to add a NEW colour which would change the colours already painted.
- I chose yellow paint, and painted the entire piece of silk yellow … where the yellow paint touched or went over wax it left little droplets of colour as it was unable to soak into anything
- but where the yellow paint touched exposed turquoise silk it turned a vibrant green!Gorgeous!
- That’s right, where yellow went on top of turquoise, it turned green (remember the colour wheel?).
- Where the yellow paint touched hot pink silk, it turned orange – faaabulous, I love bright colours!
I left the silk stretched until the paint dried, and I wiped over the whole thing with paper towel to absorb the excess paint droplets still on the wax.
I can’t wait for next week to see how to REMOVE the wax before steaming … now that’ll be fun.
Step 2 – removing the wax
In the classroom I turned on the iron and prepared the ironing space.
- I put a newspaper down first (about 20 pages), then 2 sheets of butchers’ white paper which is absorbent.
- Next I put part of the silk on the papers, and covered with another layer of butchers’ paper.
- I put the hot iron onto the paper and was amazed to see the wax melt right through the paper
- I ironed as much silk as I could, then put down clean paper, moved the scarf along, put fresh paper on top, and repeated the process on the next section of wax-covered silk.
- I repeated this until the whole scarf was cleaned of wax.
Note:
I am someone who is unable to wear perfume or to be exposed to strong odors, and I found the smell of the wax (being heated again by the iron) quite overwhelming.
I realised this was a technique I would not use again.
- The silk still had a slightly stiff feel to it, but I was assured this would disappear in the steaming process.
- The dyes used fibre-reactive powder dyes, and look brilliant.
Step 3 – Steaming the silk dyes for permanent colours
After the class, I took my silk projects home and used my silk steaming machine to make the colours permanent. With the steam-set silk dyes I usually use, I steam on high for 3 hours. With these dyes, I was told an hour would be enough.
The following day I washed the silk (I like to leave steam-set silk for at least 24 hours to let the dyes and fibres go back to normal.) and ironed it when it was almost touch dry.
The Result:
Wonderful! I’ve learnt a new technique which can have many applications and might be perfect for many texile and silk artists.
If you look at your hand-painted silk books you’ll see lots of examples of wax techniques, and now the fear of the unknown has been removed, I realise it’s not as difficult as I thought. If you’re adventurous, give it a try and don’t forget to have fun!
CAUTION
Particular care should be taken when heating wax.
- The overheating of wax is a potential fire and burn hazard and a safely-sited thermostatically-controlled wax-pot or electric frypan with a built-in thermostat is highly recommended.
- Potentially hazardous fumes can be released, especially from overheated paraffin wax.
- A well-ventilated work area is absolutely essential.
- Do not use paraffin wax at all if babies or young children are able to breathe the fumes from your work area.
- Check suppliers’ specifications and safety advice for any wax you purchase.
- Do not use the frying pan for anything other than wax or your art projects.
- Never use any art-related tools or equipment in the home — keep them exclusively for art projects.
TO REMOVE WAX WITHOUT AN IRON
- If you are using steam-fix dyes, most of the wax in the fabric will melt into the steaming paper.
- It isn’t necessary to remove it with an iron first, and it is better to avoid the fumes from this part of the process if you are going to do a lot of work this way.
- Use extra sheets of absorbent paper (between your usual steaming paper or cloth) to absorb the wax. The residue can be removed by dry-cleaning afterwards.
For further reading about dangerous dyes
There is a wealth of information in these publications from the USD Centers for Disease Control :
- Health Hazard Alert — Benzidine-, o-Tolidine-, and o-Dianisidine- Based Dyes >> (opens in new window)
- Public Health Statement for Benzidine >> (opens in new window)
- PDF from Arts, Crafts & Theater Safety in 1996 >> (opens in new window)
- the book, The Artist’s Complete Health and Safety Guide by Monona Rossol >> (opens in new window)
- another useful resource page is PRO Chemical & Dye’s Studio Safety Guidelines.
- Toxic Threads – Polluting Paradise (PDF) >> (opens in new window)
- Information for Art Class Teachers: Chemical Safety >> (opens in new window).
Did you enjoy this story, “Waxing Lyrical On My First Use of Hot Wax”?
Let me know if you’ve tried this technique, or if you have any tips to share or questions to ask. Pop over to the Contact page to send me a message, or the
Facebook page, Twitter page, or the Youtube Channel.
Have fun! Enjoy!

Teena Hughes
Not on my mailing list yet? Click the image to sign up so I can send you juicy silky tidbits 🙂

… or click here to Subscribe >>
Are You A Silk Artist Looking To Learn Silk Painting Techniques in 2020?
If "Yes!", you've landed in the right place -- here are some of the Online Training Courses about to be released: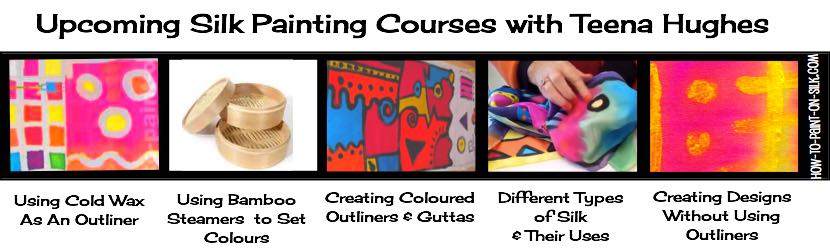
Click here to sign up for the Early Bird List to grab your place today!